
Fix Sticky Keys & Double Typing: The Safe Way to Clean Your Mechanical Keyboard
Have you ever been typing an important email, only to have your expensive mechanical keyboard start double-spacing or completely ignoring your keystrokes? It is incredibly frustrating to feel like a simple speck of dust has ruined a hundred-dollar piece of hardware. Most people panic, grab harsh liquid cleaners, and accidentally fry their entire circuit board trying to fix it. Let me show you the exact, safe method professional builders use to clean sticky switches and get your keyboard feeling brand new again.
📌 Quick Summary: How to Fix a Sticky Keyboard
- Never Use Water: Water instantly rusts the copper contacts inside your switches. Use 99% isopropyl alcohol to dissolve sticky messes safely.
- Pull Straight Up: Always use a wire keycap puller and pull straight up. Twisting the puller will snap your delicate plastic stems.
- Blast It Dry: Push the switch stem down and use a can of compressed air to blow out the hidden dust causing double-typing (key chatter).
- Cover It Up: The easiest way to stop sticky keys is to place a simple dust cover or towel over your keyboard every night while you sleep.
Preparing Your Workspace and Assembling the Safe Tools
Before you touch a single key on your keyboard, you must prepare a clean, static-free environment. Trying to clean a keyboard on a dusty carpet or a cluttered desk will only invite more particles inside the exposed switches.
Lay down a clean, dry microfiber towel on a hard, flat surface. This towel acts as a soft cushion for your keyboard and catches any tiny loose parts that might fall out during the process.
You will also need to assemble a few highly specific tools. Do not try to improvise with kitchen butter knives or metal paperclips, as these hard tools will scratch the plastic and permanently bend your keycap stems.
The Essential Tool Kit for Safe Cleaning:
- A Wire Keycap Puller: This tool has two thin metal loops that slide easily under the keycap without scratching the sides. Avoid using cheap plastic ring pullers, as they apply unequal pressure and can snap the keycap stems easily.
- A Soft-Bristled ESD Brush: A small, anti-static makeup brush or a dedicated electronics brush is perfect for sweeping away loose dust.
- Canned Compressed Air: This provides a dry, high-pressure blast of air to clear out deep debris. Never use your mouth to blow into the switches, as the humidity from your breath causes rapid corrosion.
- 99% Isopropyl Alcohol: This is the only liquid solvent you should ever use on electronics because it evaporates almost instantly.
The Gentle Way to Remove Keycaps
Now that your workspace is clean, it is time to remove the keycaps to expose the dirty switches below. This step requires a gentle touch and a lot of patience.
If you pull too hard or at an angle, you can easily pull the entire switch stem out of its housing, which will require a complex desoldering repair to fix. Take your wire keycap puller and gently expand the wires so they slip over the corners of the keycap.
The Golden Rules of Keycap Removal:
Wiggle the puller slightly until you feel the wires slide completely underneath the bottom edge of the keycap. Hold the keyboard frame down firmly with your non-dominant hand to keep it stable.
Pull the keycap puller straight upward with a slow, steady force. Never pull at an angle, and never twist the puller while pulling, as this uneven pressure will snap the plastic stem instantly.
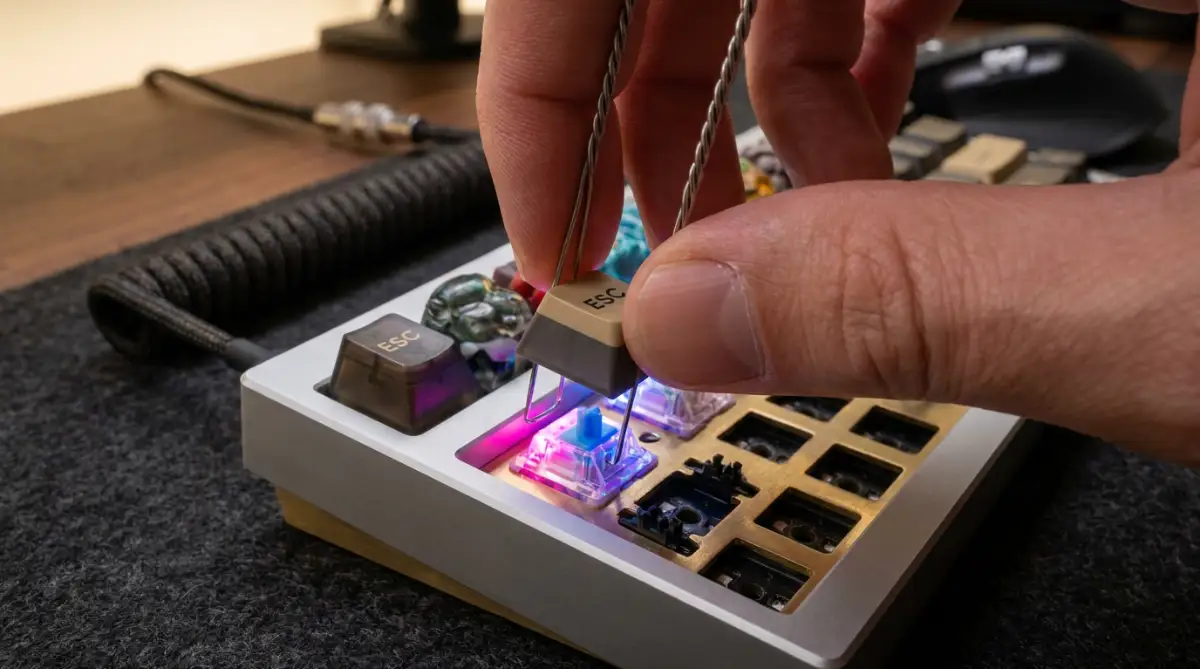
Once the keycap pops off, place it safely in a clean bowl. Repeat this process for all the keys you need to clean. If you are cleaning the larger keys like the Spacebar or Shift key, be extra careful as they often have delicate metal stabilizer bars underneath that can bend easily.
Clearing Dust Without Opening the Switch
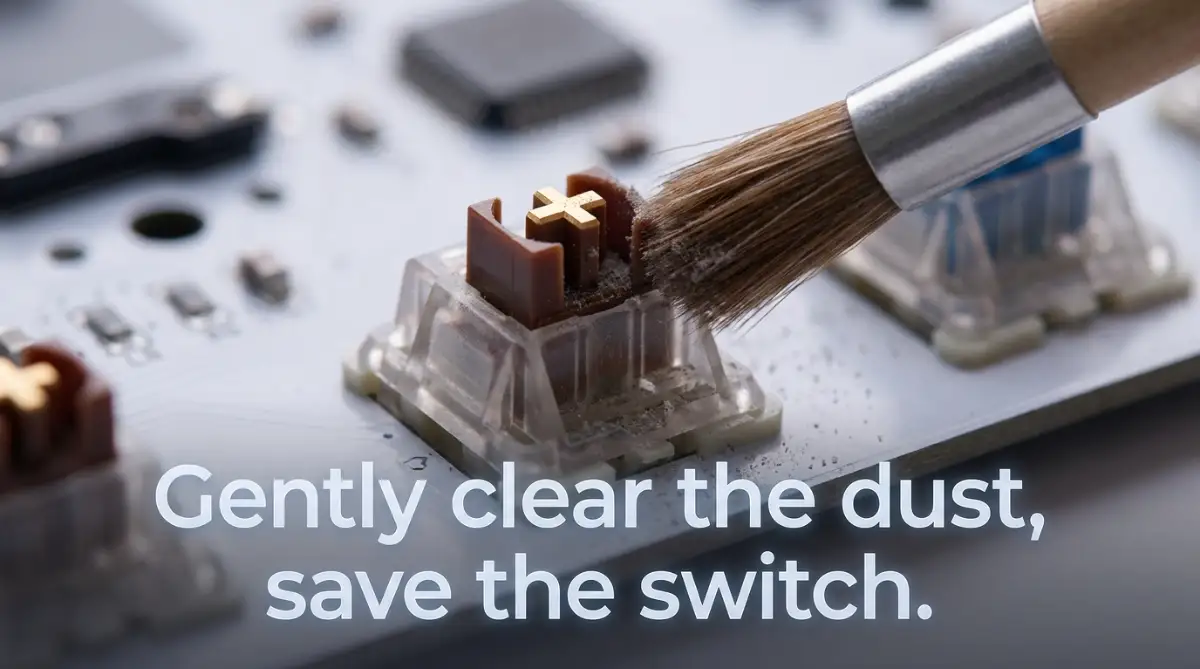
Once the keycaps are removed, you will likely see a massive build-up of hair, dust, and crumbs sitting on the keyboard plate. Before you touch the switches, you must clear this surface dust so it does not get pushed inside the switch housing during cleaning.
Use your soft-bristled brush to gently sweep the loose debris into a neat pile and dump it off the towel. Now, we can focus on cleaning the actual switches themselves.
Comparing Different Cleaning Methods for Mechanical Keyboards
The Dry Air Blast Strategy
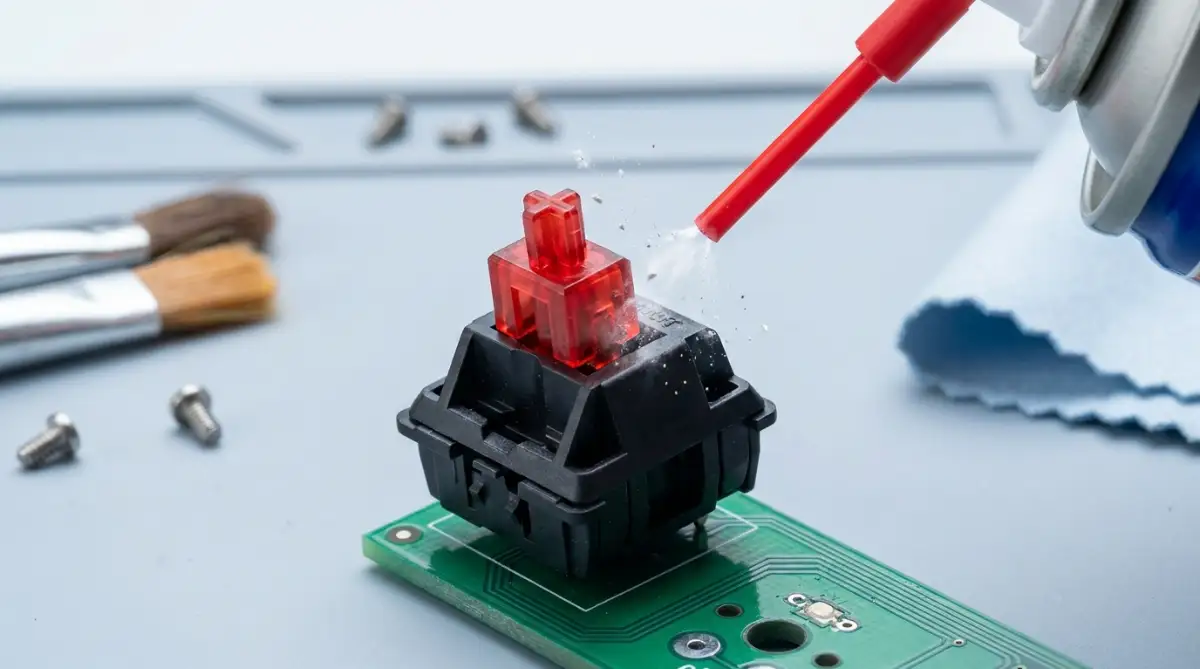
If your key is occasionally double-typing or ignoring your presses, there is likely a loose speck of dust resting directly on the internal copper contact leaves. We can use a highly targeted blast of compressed air to clear this out without opening the switch body.
Hold your can of compressed air perfectly upright. Never tilt or shake the can while spraying, as this will shoot freezing liquid propellant directly into your delicate electronics.
Press the stem of the dusty switch completely down with your finger to open up the internal chamber. Aim the thin straw of the compressed air can directly into the open gap next to the depressed stem.
Deliver two or three short, extremely quick bursts of air into the gap. This sudden blast of dry air will dislodge the trapped dust and blow it out of the switch housing safely. Release the stem, press it a few times to test the springiness, and repeat the process if the key still feels mushy.
Using Liquid Solvents Safely
If dry air does not fix the sticky behavior, you are likely dealing with a sticky residue rather than simple loose dust. This happens frequently if you eat sugary snacks or drink sodas near your desk.
To dissolve this sticky residue, you must use a highly pure liquid solvent that does not conduct electricity. Never use water, soap, or cheap rubbing alcohol from the medicine cabinet, as they contain too much water and will instantly rust the internal copper leaves.
You must use ninety-nine percent isopropyl alcohol. This highly pure alcohol dissolves sticky sugars easily and evaporates into the air in a matter of seconds.
How to Apply the Solvent Safely:
Dip a clean cotton swab into the isopropyl alcohol. Press the swab against the side of the container to squeeze out any excess liquid; you want the swab to be damp, not dripping wet.
Depress the stem of the sticky switch completely to expose the internal chamber. Gently press the damp cotton swab into the open gap, allowing a tiny drop of the alcohol to flow inside the switch housing.
Remove the swab and immediately press the switch stem up and down rapidly forty to fifty times. This rapid pumping motion distributes the alcohol throughout the internal mechanism, allowing it to dissolve the sticky residue completely.
Did You Know? The "Key Chatter" Phenomenon
When your keyboard types double letters (like "hhello"), it is not a software glitch. It is called "Key Chatter." A microscopic piece of dust gets trapped between the two copper leaves inside the switch, causing the electrical signal to bounce twice when you press it once!
Leave the keyboard unplugged and untouched for at least two full hours. Even though isopropyl alcohol evaporates incredibly fast, you must be absolutely certain the internal components are dry before you plug the device back into your computer.
Have you ever wondered exactly how the internal copper leaves inside a mechanical switch look when they make contact? Watch this incredibly detailed visual breakdown of a mechanical switch in action:
Reassembling Your Keyboard and Testing the Keys
Once the two-hour drying period is completely finished, you are ready to put your keyboard back together. This is a highly satisfying process that makes your device feel brand new.
Take your clean keycaps out of the bowl. Match each keycap to its correct switch on the board; if you are worried about forgetting where the keys go, keep a photo of the keyboard layout open on your phone for reference.
Align the cross-shaped stem of the keycap perfectly with the cross-shaped stem of the switch. Press the keycap straight down with a gentle, steady force until you feel it click firmly into place.
Do not use excessive force or slam the keycap down, as this can bend the internal metal springs. Repeat this process until all the keycaps are securely back on the board.
Plug your keyboard back into your computer and open a simple text editor. Type out a few long sentences to test every single key you cleaned.
The keys should feel completely smooth, responsive, and make a crisp, satisfying sound without any double-typing or sticking. If a key still ignores your presses, you might need to repeat the isopropyl alcohol process one more time to clear out any stubborn residue.
Keeping your hardware clean of dust is a highly important habit for long-term tech health, much like avoiding silent freelance profile mistakes that keep you from getting your first client to protect your professional career. By taking a few minutes to clean your device properly, you save yourself the massive cost of a replacement and enjoy a flawless typing experience every single day.
Advanced Maintenance Secrets for Perfect Switch Longevity
Once you understand how to remove surface dust, you need to look at strategies that keep your keyboard running smoothly for the long haul. A custom mechanical keyboard is not just a typing tool; it is a complex array of moving parts that require regular, precise care.
If you want your switches to last for millions of keystrokes without losing their crisp, tactile feel, you need to understand how dust behaves inside the keyboard chassis. Let's look closely at the advanced secrets that professional keyboard builders use to protect their high-end setups.
The Art of Cleaning Stabilizers Without Desoldering
Your larger keys, like the Spacebar, Shift, and Enter keys, rely on small wire brackets called stabilizers to keep the keycap from wobbling when you press the edges. Over time, hair, dust, and pocket lint will mix with the sticky lubricant inside these stabilizers, turning it into a thick, abrasive paste.
This sticky mixture causes your spacebar to feel muddy, slow, and highly unresponsive. To fix this without taking the entire keyboard apart, you need to perform a targeted stabilizer flush.
Take a small, clean syringe and fill it with ninety-nine percent isopropyl alcohol. Insert the thin plastic tip of the syringe directly into the stabilizer housing where the metal wire meets the plastic stem.
Gently squeeze a tiny amount of the alcohol inside, and immediately press the key rapidly thirty times to dissolve the dirty, compacted grease. Once the old dirty grease is completely dissolved and flushed out, let the area dry for an hour before carefully applying a fresh, tiny drop of premium electronic grease.
Taking the time to clean these complex parts is just as important as knowing how to speed up your phone simple steps to clear app cache on android. Both processes focus on removing hidden, daily buildup to restore original performance.
Utilizing Specialized Electronic Contact Cleaners
For extremely stubborn keys that continue to double-type even after a compressed air blast, you need to use a specialized chemical cleaner. Standard isopropyl alcohol is excellent, but it cannot always reach the tightest corners of a sealed, non-hot-swappable switch.
In these difficult scenarios, professional builders rely on a dedicated electronic contact cleaner, such as DeoxIT. This specialized chemical spray is specifically engineered to dissolve microscopic carbon buildup and rust from copper contacts without damaging surrounding plastics.
You can find these cleaners at local hardware stores or online electronics shops. According to chemical compatibility guidelines published by the American Chemical Society, professional contact cleaners are completely non-conductive and evaporate almost instantly, making them extremely safe for high-end circuit boards.
To apply it safely, press the switch stem down completely and spray a very brief, half-second burst of the cleaner directly into the internal leaf spring. Let the liquid sit undisturbed for five minutes, then press the key rapidly forty times to ensure the chemical clears away any hidden oxidation.
Developing a Long-Term Dust Defense System
The absolute easiest way to deal with keyboard dust is to simply stop it from entering your keyboard chassis in the first place. You do not need to keep your workspace under a sterile glass dome.
You just need to build a simple daily defense routine. When you are done working for the day, always cover your keyboard with a simple, inexpensive acrylic dust cover or a clean microfiber towel.
Leaving your keyboard exposed to the open room overnight is exactly like leaving your house doors wide open during a dust storm. Millions of microscopic skin cells, pet hairs, and dust particles float through the air and settle directly into your keys while you sleep.
Skipping this basic, two-second protective step is a bad habit, similar to dangerous morning routine mistakes that secretly destroy your daily productivity. By simply covering your gear at night, you can reduce the need for deep cleaning sessions by almost eighty percent.

Dangerous Pitfalls That Can Instantly Ruin Your Custom Keyboard
Even when people have the best intentions, the excitement of cleaning their own gear can easily lead to catastrophic hardware failures. We often get impatient, rush the process, and use the completely wrong methods to save time.
If you do not recognize these common traps, you will end up permanently destroying your expensive electronics. Let's look closely at the worst mistakes that cause immediate, unrepairable damage to custom keyboards.
The Catastrophic "Water and Soap" Disaster
This is arguably the most common and destructive mistake beginners make when trying to clean a dirty keyboard plate. They see a layer of grease and dust on the metal plate between the switches, and they decide to wipe it down using a damp kitchen sponge soaked in soapy water.
This is a guaranteed death sentence for your keyboard's printed circuit board (PCB). Water is highly conductive and will instantly slip through the microscopic gaps around the switch housings, pooling directly on the copper circuits below.
Even if the keyboard is completely unplugged, the water will slowly react with the copper traces on the PCB, causing rapid rust and corrosion within a few hours. Once those copper traces rust, the electrical signals cannot travel, resulting in a completely dead keyboard.
If your keyboard suddenly dies mid-work due to water damage, the sudden loss of your productivity is a major disaster. It is a highly stressful experience, much like when your hard drive crashed how to rescue your lost files before it s too late. Never allow any form of water to go near your exposed switches.
Over-Lubing: The Slow Death of Tactile Feedback
Many mechanical keyboard enthusiasts love the smooth, deep, quiet sound of professionally lubricated switches. They buy premium grease and spend hours carefully painting the internal stems of every single switch on their board.
But when it comes to switch lubrication, less is always more. If you apply too much grease inside the switch housing, the excess lubricant will act exactly like a magnet for any floating dust particles.
The dust will mix with the grease, creating a thick, sticky mud inside the switch that completely ruins the tactile bump. Your keys will feel incredibly heavy, mushy, and slow to return to their original position.
To fix an over-lubed switch, you have to completely desolder it, take it apart, and wash the grease off with solvent, which is an incredibly tedious, painful process. Always apply the thinnest possible layer of grease, and keep it completely away from the delicate copper contact leaves.
Quick Look: The Switch Lube Cheat Sheet
Forcing Bent Pins into the PCB Sockets
If you own a modern, hot-swappable keyboard, you have the incredible ability to pull entire switches out of the board without using a soldering iron. This makes cleaning and replacing broken switches incredibly easy.
But this convenience comes with a major physical hazard. The two copper pins at the bottom of the switch are extremely thin, soft, and easy to bend.
When you are pushing a clean switch back into the board, you must align it perfectly straight. If a pin is slightly bent, and you push down with aggressive force, you will permanently crush the copper pin flat against the bottom of the switch.
Even worse, you can easily damage the delicate hot-swap socket soldered onto the back of the PCB. This physical damage will completely ruin that specific key slot forever, requiring a complex soldering repair to fix.
Always check the bottom pins under a bright light to ensure they are perfectly straight before inserting them. Ignoring these basic hardware checks is a massive risk, just like making dangerous password management mistakes that leave your digital identity exposed. You must pay close attention to physical details to protect your expensive investments.
Your Ultimate Roadmap to a Flawless Typing Experience
We have covered a massive amount of physical hardware maintenance today. The goal here is not to make you paranoid about every single speck of dust on your desk.
The real goal is to give you absolute, unshakeable control over your own technical tools. When you understand the physical limits of your hardware, you stop making panicked mistakes and start making smart, strategic decisions.
Your 15-Minute Weekly Maintenance Plan
You do not need to spend hours taking your keyboard apart every single weekend. You just need a simple, consistent weekly routine to keep the dust from ever building up:
- Sunday Afternoon: Unplug your keyboard completely from the computer.
- Sweep the Plate: Take your soft ESD brush and gently sweep away any loose hair or crumbs from between the keycap rows.
- The Air Blast: Give the spacebar and common keys three quick, dry bursts of compressed air to clear out hidden dust.
- Cover It Up: When you go to bed, always place your simple dust cover over the keyboard.
If you maintain this simple weekly routine, you will never have to deal with sticky keys or double-typing errors again. Your switches will remain crisp, clean, and perfectly responsive for years to come.
Protecting Your Investment for the Long Haul
Your custom mechanical keyboard is an expensive, highly complex investment. Treating it with care does not just save you money; it protects your daily work energy and your passion for your projects.
Neglecting your keyboard is one of those overlooked habits that quietly destroy your smartphone battery lifespan by ignoring basic hardware wear and tear. If you ignore your physical tools, they will eventually break down and fail you when you need them most.
If you are already trying to save your console simple ways to spot and avoid overheating issues, you know that proactive, regular maintenance is the only true way to protect your digital lifestyle. Apply that exact same serious focus to your keyboard switches.
I spent nearly three months dealing with a highly annoying double-typing spacebar because I was simply too lazy to clean out the pocket lint hiding inside the housing. I wanted to throw the entire expensive keyboard into the garbage out of pure frustration.
But the exact morning I finally sat down, used my wire puller, and cleared out the debris with a gentle blast of dry compressed air, the keys felt instantly brand new. I promise you, if you push past the temporary awkwardness of handling delicate electronics and follow this strict blueprint today, your keyboard will reward you with a flawless, satisfying typing experience for years to come.
Frequently Asked Questions About Cleaning Keyboard Switches
Can I use a standard hairdryer to blow dust out of my keyboard switches?
No, you should never use a hairdryer to clean your electronics. Hairdryers generate a massive amount of static electricity that can instantly fry the delicate copper traces on your keyboard's PCB. Additionally, the hot air can easily melt the thin plastic stems of your custom keycaps, causing permanent physical damage.
Is it safe to use water to clean my dirty mechanical switches?
No, you must never allow any form of water to touch your exposed switches. Water is highly conductive and will cause immediate rust on the internal copper contact leaves, leading to a permanent short circuit. Always use ninety-nine percent pure isopropyl alcohol, as it dissolves dirt easily and evaporates completely into the air within seconds.
Why does my mechanical keyboard occasionally type two letters when I only press the key once?
This highly annoying problem is known as "key chatter," and it is almost always caused by a tiny speck of dust resting directly between the internal copper contact leaves. When the switch stem goes down, the dust forces the copper leaves to bounce rapidly, tricking your computer into thinking you pressed the key multiple times. A quick blast of dry compressed air usually solves this issue immediately.
How do I know if my mechanical keyboard switches are hot-swappable?
You must check the official manufacturer documentation of your specific keyboard model. If your board is hot-swappable, it means the switches are held in place by friction sockets, and you can easily pull them out using a metal switch puller. If your board is not hot-swappable, the switches are soldered directly onto the PCB, and attempting to pull them out with force will permanently ruin the board.
Can I clean my keyboard without taking off all the keycaps?
While you can use a soft brush to sweep away loose surface dust from between the rows, you cannot perform a deep, effective clean of the switches without removing the caps. The keycaps physically block your access to the internal switch housings, making it impossible to target the compressed air or the isopropyl alcohol into the correct gaps.
How often should I perform a deep clean of my custom mechanical keyboard?
If you maintain a clean desk environment and always cover your keyboard at night, you should only need to perform a deep, keycap-off cleaning once every six months. However, if you frequently eat snacks near your desk, or if you have pets that shed heavily, you should perform this deep clean every three months to prevent stubborn buildup.
Disclaimer: The information provided in this blog post is strictly for educational and informational purposes only. Modern custom mechanical keyboards contain highly delicate electronic components and sensitive copper circuits. Attempting to clean, open, or repair your keyboard switches carries a risk of permanent hardware damage or voiding your manufacturer warranty if done incorrectly. Always consult your specific keyboard's official instruction manual or contact a professional technician for advanced electronics repair.