The Frustrating Reality of Bizarre AI Images
You finally decide to try out a popular AI image generator for the very first time. You type a simple, exciting idea into the text box and wait eagerly for the magic to happen.
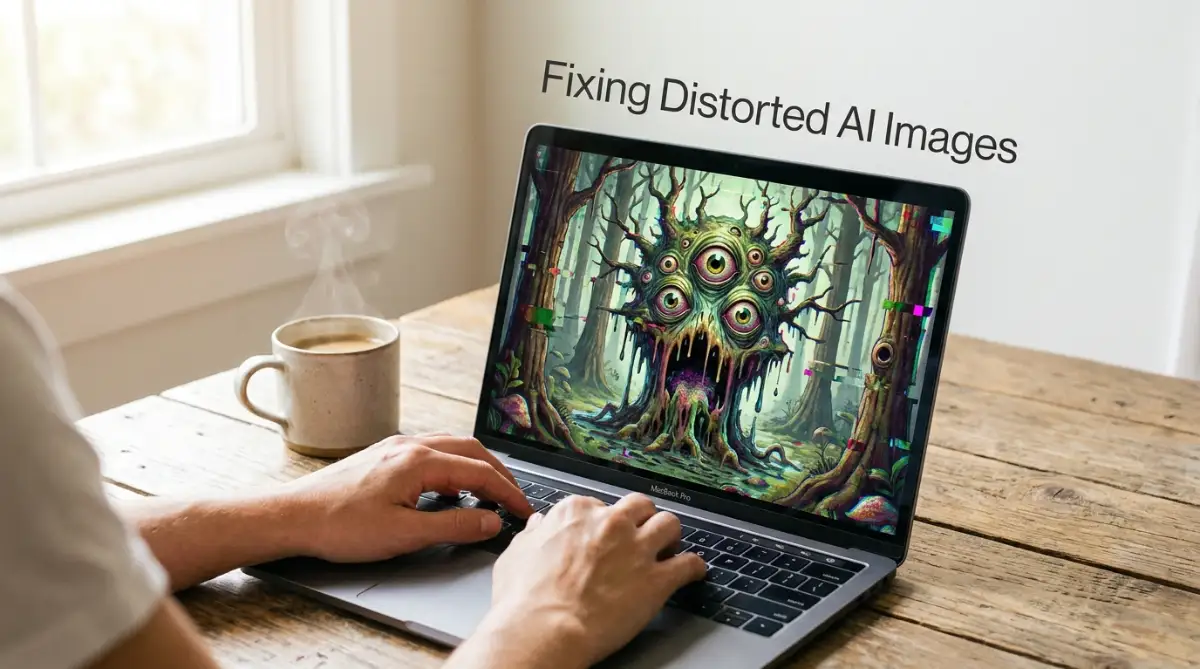
Instead of a beautiful masterpiece, the screen shows you an absolute nightmare. The human characters have seven fingers on one hand, their eyes are looking in different directions, and the background is a blurry, confusing mess.
You feel an immediate wave of disappointment wash over you. You expected a professional piece of digital art, but you received an image that looks like a melted painting.
When you search online for help, the internet throws a massive wall of confusing technical jargon right in your face. It is incredibly easy to make simple mistakes that waste your time and your expensive daily generation credits.
Here is exactly why so many creative people fail to get good results and end up quitting entirely:
- Copying massive, confusing prompts: Beginners often copy giant blocks of text from other artists without understanding what the words actually do. This heavily confuses the computer and creates random, messy outputs.
- Ignoring the power of negative instructions: Most new users only tell the computer what they want to see. They completely forget to tell the system what things they absolutely want to avoid.
- Misunderstanding how the software thinks: People treat the software like a human artist who can read their minds. In reality, the machine is just a mathematical prediction engine that needs highly specific guidance.
- Using the wrong descriptive words: Beginners use emotional words instead of visual words. The computer does not understand the feeling of "happiness," but it perfectly understands "a woman smiling brightly."
This constant cycle of typing, waiting, and getting terrible results creates a deep emotional frustration. The stress does not just sit on your computer screen; it heavily impacts your creative confidence.
Here is a professional look at how this silent technical struggle slowly destroys your peace of mind:
- The heavy feeling of being left behind: You see everyone else on social media posting flawless AI images. This makes you feel like you are not smart enough to understand modern technology.
- Wasting hard-earned money: Many AI tools require paid subscriptions or credits for every single image. Every time you generate a bad image, it feels like you are throwing actual money directly into the trash.
- Crushed creative self-worth: You have amazing, beautiful ideas inside your head. When you cannot get the machine to show those ideas on the screen, you start believing you lack true artistic vision.
- Giving up on personal projects: The heavy frustration makes you abandon your book cover designs, blog graphics, or marketing materials entirely. You walk away from your goals because the tool feels impossible to master.
Generating weird, distorted images does not mean you are a bad artist or bad with computers. It simply means you are currently speaking the wrong language to the machine.
These software tools are incredibly powerful, but they require a very specific type of communication. They do not think like we do; they think in pixels, patterns, and mathematical weights.
By deeply understanding how these modern systems read your text, you can easily command them to create exactly what you want. You hold the actual creative power, and I am going to show you exactly how to use it safely.
Your Strategic Blueprint for Flawless AI Images
Getting a perfect image on your first try does not rely on wishing for good luck. It certainly does not matter if you know complex computer coding.
Getting a beautiful result relies entirely on structured communication and smart preparation. The software uses very specific mathematical formulas to turn your plain text into colorful pixels.
If you understand the exact rules these computer models follow, you can easily organize your words to force an amazing output. We are going to look at the three most practical, logical steps you must take right now to secure a perfect generation.
Step 1: Stop Giving the Machine Vague and Lazy Instructions
The absolute biggest mistake beginners make happens the moment they touch their keyboard. They type extremely short, lazy sentences and expect the machine to fill in the missing details perfectly.
If you type "a dog in a park," you are giving the software entirely too much freedom. The system has to guess the breed of the dog, the weather, the time of day, and the camera angle.
Because it has to guess so many different things at once, it usually produces a very boring, generic, and often blurry image. You must remember that the computer is not a mind reader.
Let me give you a highly practical analogy. Imagine walking into a busy restaurant and telling the chef, "Make me a sandwich."
The chef has no idea if you want turkey, beef, cheese, or vegetables. He might bring you a peanut butter sandwich when you actually wanted hot grilled chicken.
To get exactly what you want, you have to be highly specific. The exact same scientific principle applies to AI image generation.
Instead of writing "a dog in a park," you need to build a highly structured sentence. You should write, "A happy golden retriever running through a bright green grassy park, sunny afternoon, highly detailed, photorealistic."
Your Actionable Advice for Today:
Before you ever hit the generate button, you must break your text down into four specific building blocks. Every good instruction needs a clear subject, a specific environment, a lighting condition, and a distinct art style.
Always start with your main subject first, because the computer pays the most attention to the very first words you type. If you want a cyberpunk city, do not put the word "cyberpunk" at the very end of your sentence.
Describe the physical details of your subject immediately. Are they wearing a red jacket? Are they looking directly at the camera?
Next, tell the computer exactly what type of art you want. Do you want a watercolor painting, a 3D cartoon, or a 35mm photograph? By feeding the machine highly specific visual data, you completely remove its need to guess, resulting in a perfectly clear image.
Step 2: Master the Hidden Power of Negative Instructions
Once you learn how to write a detailed sentence, you will immediately face the second massive hurdle. You will notice that your characters still have melted faces, extra arms, or weird, blended backgrounds.
Most everyday users try to fix this by typing things like "do not make ugly hands" in their main text box. This is a terrible mistake that actually causes more problems.
When you type the word "ugly hands," the computer only focuses on the word "hands." It completely ignores the "do not make" part, which means it will actually try to draw more hands in your image.
To fix this frustrating issue, you must learn how to use the Negative Prompt box. Almost every high-quality software tool has a secondary text box hidden right below the main one.
This specific box acts as a powerful mathematical filter. Anything you type in this secondary box will be aggressively removed from your final image.
Let us look at a real-life scenario to make this crystal clear. Let us say you are trying to generate a beautiful portrait of a woman, but the system keeps adding a pair of glasses to her face.
Instead of fighting the main text, you simply type the word "glasses" into the negative box. The computer will actively search the pixels and aggressively erase any signs of glasses before showing you the final result.
Your Actionable Advice for Today:
You must treat the negative box as your ultimate safety net for quality control. Every single time you generate an image, you should include a standard list of safety words in this specific section.
A highly effective baseline list includes words like: "blurry, deformed, extra fingers, mutated, bad anatomy, text, watermarks." By plugging these words into the negative section, you are forcing the system to block common digital errors automatically.
If you notice the software keeps giving you a blue sky when you want a gray sky, just put "blue sky" in the negative area. This simple mathematical subtraction gives you incredible, precise control over the final visual output.
Step 3: Stop Ignoring the Rules of Framing and Aspect Ratio
One of the most tragic mistakes beginners make is generating every single image in a perfect square. A square box is the default setting for almost every generation tool on the market.
While a square is great for an Instagram post, it is completely useless for a YouTube thumbnail or a website banner. When people try to stretch a square image to fit a wide screen, it becomes heavily distorted and horribly pixelated.
Beyond just the shape of the image, beginners completely ignore camera framing. They want a close-up portrait of a face, but they get a wide shot of a person standing far away in a field.
Think of this practical analogy. If you hand a professional camera to a friend and say "take my picture," they might stand twenty feet away.
If you wanted a close-up of your new haircut, you have to tell them to walk closer. You have to guide the artificial intelligence in the exact same way using specific photography terms.
Your Actionable Advice for Today:
Before you spend a credit, always check the settings menu to adjust your image dimensions. If you need a picture for a blog post or a video, change the setting to a wide format (like 16:9).
Changing the shape of the canvas actually changes how the computer draws the background. It gives the software more room to create beautiful, wide scenery.
Next, you must use direct camera terminology in your text to control the distance. If you want to see someone's face clearly, start your sentence with "Extreme close-up macro portrait of..."
If you want to see their shoes and the street they are walking on, start your sentence with "Full body wide shot of..." These specific industry keywords force the machine to crop the image exactly how a professional human photographer would.
By combining the correct canvas shape with the correct camera words, you completely eliminate those annoying, poorly cropped results. You stop wasting your daily credits and start producing images that look like they belong in a high-end digital gallery.
Advanced Secrets for Professional Grade Generations
Now that you understand the basic building blocks of a text prompt, we need to completely upgrade your technical skills. I want to share the exact strategies that professional digital artists use to create flawless masterpieces.
When you type a simple sentence into a text box, you are talking to a highly complex mathematical system. According to technology experts at Forbes, modern generative engines do not read sentences with human emotion.
Instead, they assign a specific mathematical weight to every single word you type. If you use the wrong words, the computer gets mathematically confused, resulting in a distorted, messy output.
When you constantly waste paid generation credits on terrible images, the financial frustration builds up very fast. If you are already managing a tight household budget or figuring out how to get unsecured loans with bad credit and actually get approved, throwing your cash at a broken computer program is incredibly stressful.
We need to stop wasting your money and start commanding the software correctly. To do this, you must treat your text prompt like a highly organized set of studio instructions.
A messy, overloaded text prompt acts exactly like a heavy, pore-clogging lotion on your face. We already know that avoiding common nighttime skincare mistakes that cause unexpected breakouts means stripping away unnecessary, heavy products.
In the digital art world, you must strip away unnecessary, heavy words so your main subject can breathe clearly. Let us look at the advanced techniques you can use today to force the software to give you exactly what you want.
Step 4: Control the Virtual Studio Lighting
One of the biggest reasons beginner images look completely fake or flat is a total lack of lighting instructions. Beginners will describe a beautiful character standing in a forest, but they completely forget to tell the computer where the sun is located.
When you do not specify a light source, the software uses a generic, flat lighting model. This makes your highly detailed image look like a cheap plastic video game graphic.
Professional photographers at Adobe note that lighting completely dictates the entire emotional mood of any visual piece. You have to act like a Hollywood movie director and tell the system exactly how to light your scene.
Let us look at a highly practical scenario. Imagine taking a picture of an apple sitting on a kitchen table.
If you turn on the bright fluorescent ceiling lights, the apple looks boring and flat. But if you turn off the overhead lights and shine a warm flashlight at the apple from the side, it suddenly looks highly dramatic and professional.
Your Actionable Advice for Today:
You must permanently add specific lighting keywords to the very end of your text prompts. If you want a soft, romantic outdoor picture, use the phrase "golden hour lighting, soft sun rays, cinematic glow."
If you want a moody, futuristic city scene, use the phrase "neon rim lighting, harsh shadows, volumetric fog." By forcing the computer to render specific light rays, your images will instantly upgrade from amateur snapshots to professional, museum-quality art.
Step 5: Master the Power of Mathematical Weights
Sometimes, you will write a perfectly structured prompt, but the computer completely ignores one specific detail. You might ask for a "man wearing a bright red hat," but the software continuously generates a man with no hat at all.
This happens because the system gets distracted by other heavy words in your sentence. It simply runs out of processing power before it reaches the word "hat."
To fix this frustrating issue, you must use a secret technique called prompt weighting. This simply means adding special brackets or numbers around a specific word to mathematically force the computer to pay attention to it.
Think of this practical analogy. Imagine writing a grocery list for a friend going to the store.
If you write a list of twenty items in plain text, they might forget the milk. But if you take a bright red marker and circle the word "milk" three times, they are guaranteed to buy it.
In most modern generation tools, you can add parentheses around a word to increase its strength. Typing (bright red hat) tells the software to multiply the importance of that specific item.
If the hat still does not appear, you can add more weight by typing ((bright red hat)) or using a numbering system like (bright red hat:1.5). This forces the mathematical algorithm to prioritize the hat over everything else in the picture.
How to Maintain Long-Term Creative Success
Getting a lucky, beautiful generation on your first day is a great feeling. But your ultimate goal should be gaining the ability to produce amazing art on demand, every single time you sit at your desk.
The absolute secret to long-term success with this technology is keeping a highly detailed prompt journal. Do not rely on your memory to remember which specific words gave you the best results last week.
Open a simple digital notepad on your computer and save your most successful text combinations. When you find a lighting phrase or a negative prompt that works perfectly, copy and paste it into your master list.
Treat this journal like your personal recipe book. Over the next few weeks, you will build a massive library of proven, tested commands. You will never have to start from zero again, saving you massive amounts of time and expensive daily credits.

Five Dangerous Traps Ruining Your Digital Art
Even highly intelligent people make terrible choices when they get overly excited about a new technology. The thrill of typing a sentence and seeing a picture appear often blinds users to basic software rules.
If you fall into these incredibly common traps, you will waste hours of your time staring at deformed, ugly outputs. This frustrating cycle can easily ruin your confidence and make you quit the hobby entirely.
Here is exactly what you must avoid to keep your digital creations looking flawless and highly professional.
1. The "Word Salad" Approach
When a beginner gets a bad result, their first instinct is to aggressively type fifty more adjectives into the box. They will type "beautiful, stunning, gorgeous, amazing, masterpiece, highly detailed, perfect, awesome."
This is known as a word salad, and it completely destroys the computer's processing power. The software gets so confused trying to figure out what "awesome" actually looks like that it ruins the main subject completely.
Always keep your instructions clean, tight, and highly specific. Use strong visual nouns instead of weak emotional adjectives to guide the machine safely.
2. Mixing Impossible Art Styles
Many new users try to combine completely different artistic mediums into one single sentence. They will type instructions like, "A photorealistic 3D cartoon oil painting of a cat."
This creates a massive mathematical conflict inside the software. A picture cannot be a flat oil painting and a photorealistic 3D object at the exact same time.
The computer tries to blend these impossible styles together, resulting in a terrifying, messy image that falls deeply into the uncanny valley. Always pick one single, distinct art style per image and stick to it strictly.
3. Ignoring the Specific Camera Angles
Beginners completely forget that the software operates like a virtual camera lens in a 3D space. If you do not tell the camera where to stand, it will usually guess wrong.
You might want a detailed picture of a character's face, but the software draws them standing a hundred feet away in a massive field. To fix this, you must use direct photography terms at the very beginning of your sentence.
Use commands like "Extreme macro close-up," or "Wide-angle establishing shot," or "Over-the-shoulder view." This forces the artificial intelligence to crop the scene exactly how a human photographer would.
4. Triggering the Safety Censorship Filters
Almost all high-end generation tools have very strict, automated safety filters built into their programming. These filters are designed to instantly block illegal or highly offensive content.
However, beginners often accidentally trigger these filters by using innocent words that have double meanings. For example, typing "a bloody steak on a grill" or "a photographer shooting a model" will often trigger violence filters.
If you trigger the safety filters too many times, your paid account will be permanently banned without a refund. Losing a paid software subscription over a silly word mistake is a terrible financial blow.
You do not want to be forced into researching easy signature loans without any collateral because you wasted your business budget on suspended graphic design accounts. Always use safe, highly descriptive alternatives like "a rare cooked steak" or "a photographer photographing a model."
5. Treating the Software Like a Slot Machine
The most tragic mistake beginners make is treating the generation button like a casino slot machine. They type a bad prompt, get a bad image, and simply hit the generate button fifty more times hoping to get lucky.
The computer does not change its logic just because you clicked the button again. If your text instructions are poorly written, you will get fifty bad images in a row.
If an image looks wrong, you must stop clicking. Read your sentence carefully, change the specific words causing the problem, and try again with a newly structured command.
Your New Path to Flawless Digital Creations
Navigating the complex world of prompt engineering does not have to be a scary or overwhelming experience. You now hold the exact same technical knowledge that professional digital artists use to create viral masterpieces.
By taking a few hours to understand how mathematical weights and virtual lighting work, you completely remove the frustration of random results. You are no longer begging a mysterious computer for a lucky favor.
Instead, you are confidently commanding the software as a highly reliable, structured tool. This simple shift in your mental approach gives you incredible power over your entire creative process.
You are fully capable of generating stunning, lifelike imagery without feeling stressed, rushed, or confused by technical failures. Remember that the software is simply a digital paintbrush waiting for your specific instructions.
Like a sharp carving knife, it can help you build a beautiful sculpture, or it can cause a massive mess if you swing it carelessly. Take a deep breath and start with the very first step today.
Open your favorite generation tool, use the four-block sentence structure, and aggressively utilize your negative prompt box. You have the total ability to turn your imagination into a physical reality smoothly and intelligently.
Protect your daily credits, read your sentences slowly, and take complete control of your digital art journey starting right now.